Lab 04: Network Analysis
GTECH 36100 GIS Analysis
GTECH 73200 Advanced GeoInformatics
Lab: Topology, Networks and Network Analysis
I. Objectives
Networks and location analysis are what we learn in these two weeks. Network analysis is a very unique sub-field in GIS. It is the foundation of transportation GIS and has numerous applications in the business world. Its mathematical foundation, the graph theory, is a field where many prominent yet hard questions are waiting for answers. We will learn key terms and fundamental concepts in networks and location analysis.
ArcGIS has three types of networks: trace, utility, and transportation networks. Trace and utility networks offer a way to model common networks and infrastructures found in the real world. Water distribution, electrical lines, gas pipelines, telephone services, and water flow in a stream are all examples of resource flows that can be modeled and analyzed using a utility or trace network. Transportation networks are more complex as they are multi-modal and, in many cases, we must process the connectivity between different modes manually. Topology is critical to networks, and we need to learn how to create, maintain, and edit topology.
II. Lab Tasks and Requirements
TASK 1 Topology and Hydro Network
Step 1 Prepare the data with a Feature Dataset
Download the Gadsden County data in a File GDB or FGDB (file Geodatabase), which contain the county boundary, water basins/sub-basins, and streams. Reminder: do NOT place a .gdb folder (actually a FGDB) inside another .gdb folder.
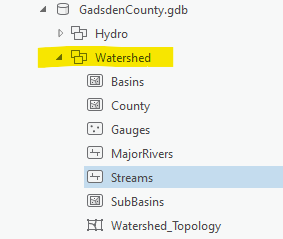
Create a feature dataset for all feature classes (the FGDB has already had a feature dataset named Watershed, but you can try to create a new one for your exercise).
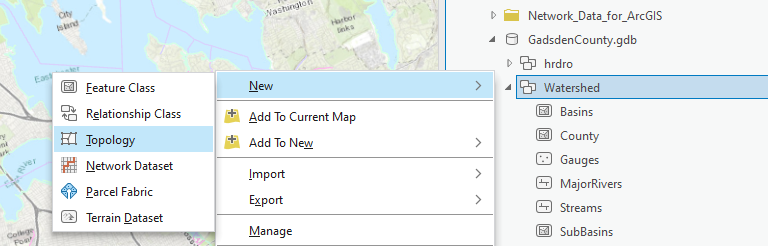
Step 2 Create Topology
- Create a topology on the feature dataset. Recall the properties of a feature dataset. Why the topology must be built on a feature dataset?
- Add the following rules on sub-basins and streams feature classes.
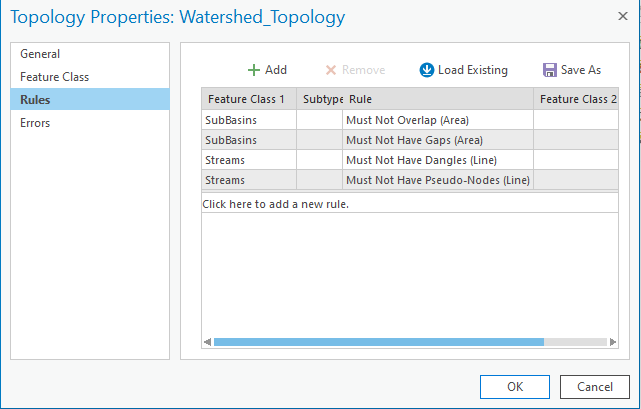
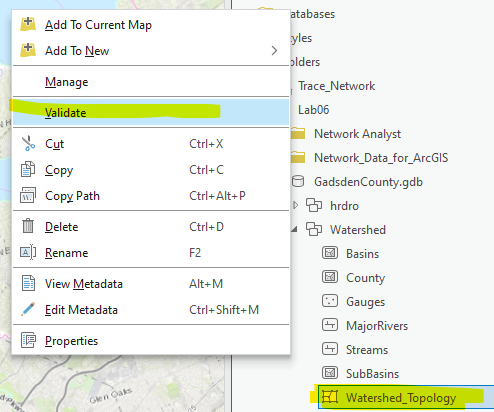
- Validate the topology and show all the violations.
Step 3 Check and Fix Errors
- With Error Inspector, we can see there are many errors. Record the number of errors.
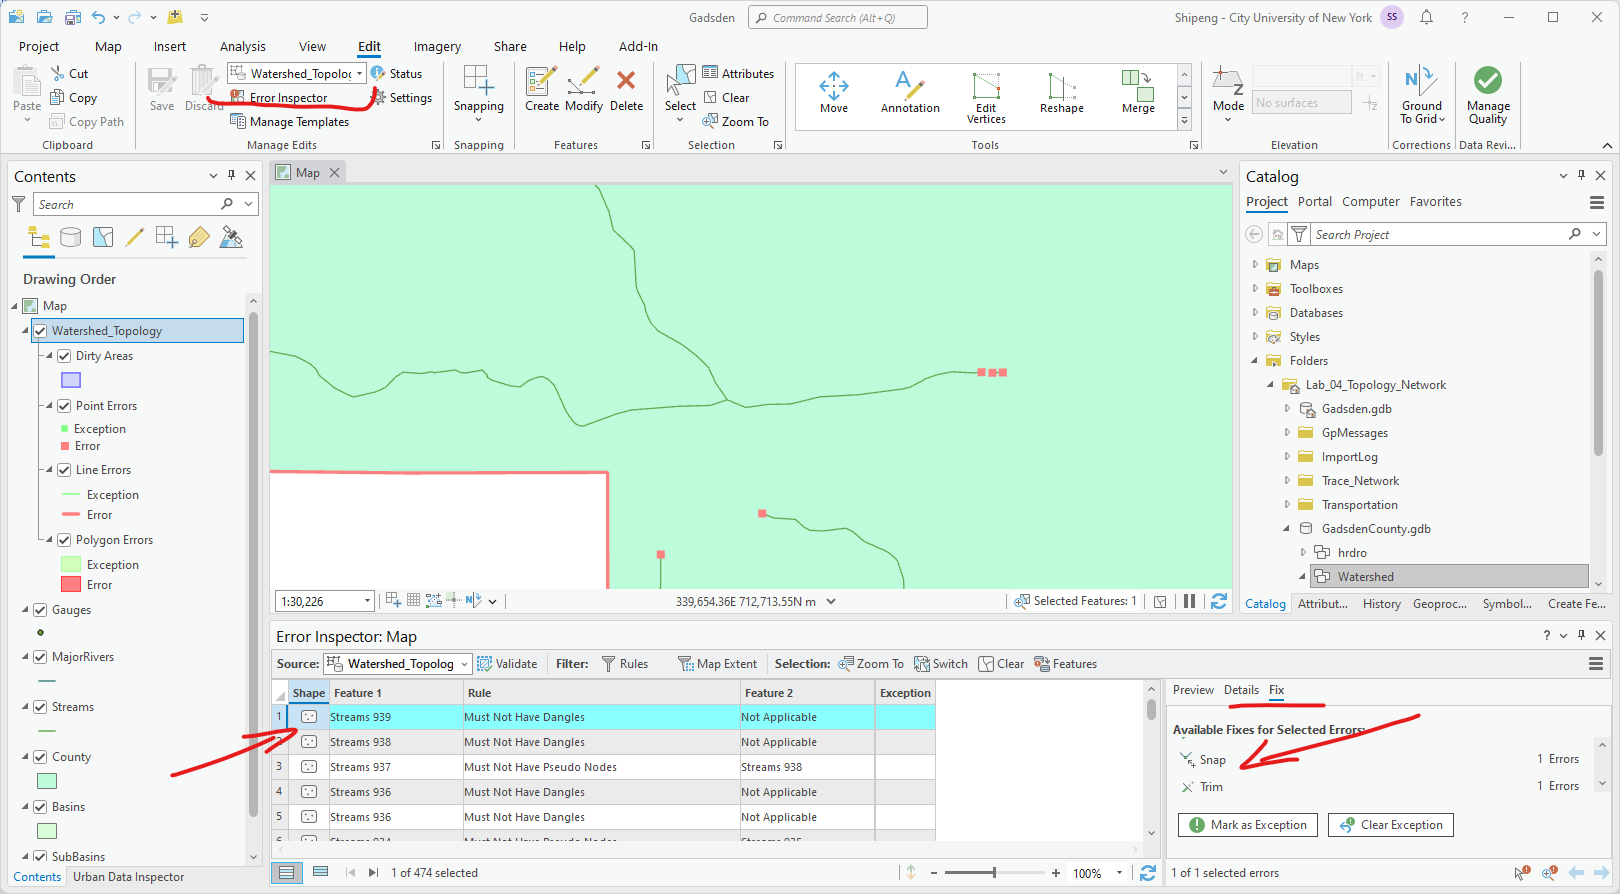
In real-world situations, we need to fix all these errors to have high-quality data. For an exercise, we will only try to fix the simple errors violating the last rule, the Pseudo-Nodes.
- Let’s first filter/select this type of errors.
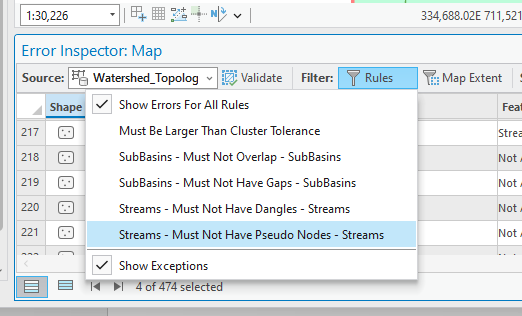
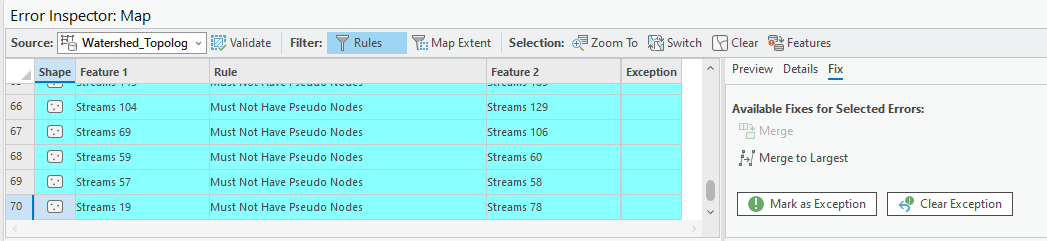
- Then select all the features that violate this rule. ArcGIS Pro has suggested fix for this type of error: Merge to Largest. Basically, this fix will connect those pseudo-nodes to the line-strings of rivers. Once more, in real-world applications, we must make sure such “automatic” fix really fixes errors. Where it cannot, we need to manually edit our data like what we did in the Geodatabase Lab.
After fixing the error of Pseudo-nodes, how many topology errors does the dataset have?
Remove the third rule in the topology and re-validate the topology. Show the number of errors/violations now.
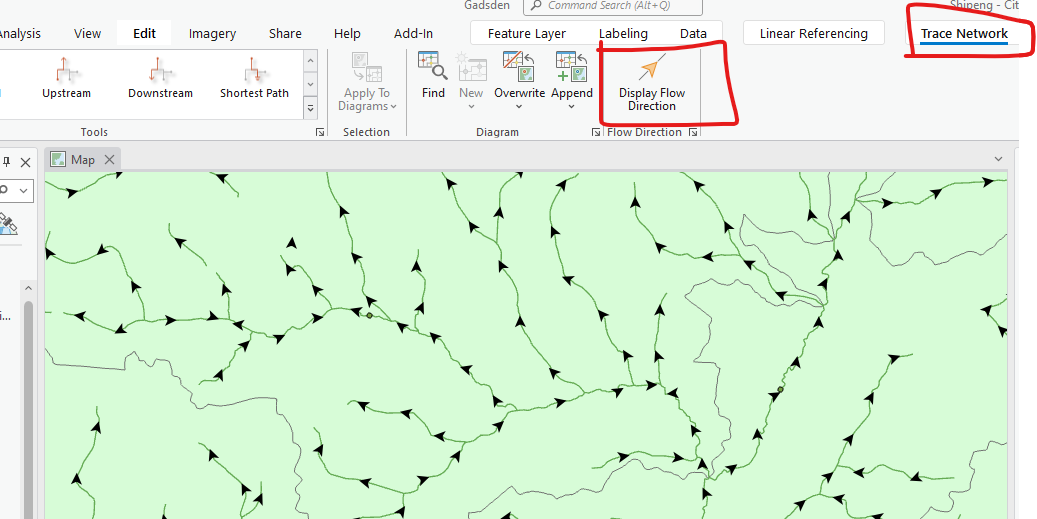
Step 4 Create Trace Network
Once the topology is validated and we know the data quality is fine, we can create a simple Trace Network from the streams.
- Create a trace network (Geoprocessing tool) from the Streams.

Enable Network Topology (Geoprocessing tool) on the trace network.
Show flow direction (possible issue with ArcGIS Pro. Try to restart it if the directions do not show up on the map)
Step 5 Conduct Trace Network Analysis
- Conduct an upstream and downstream analysis using the trace network. First, we need to use the Trace tool to add starting points and possibly some barriers (dams, for example).
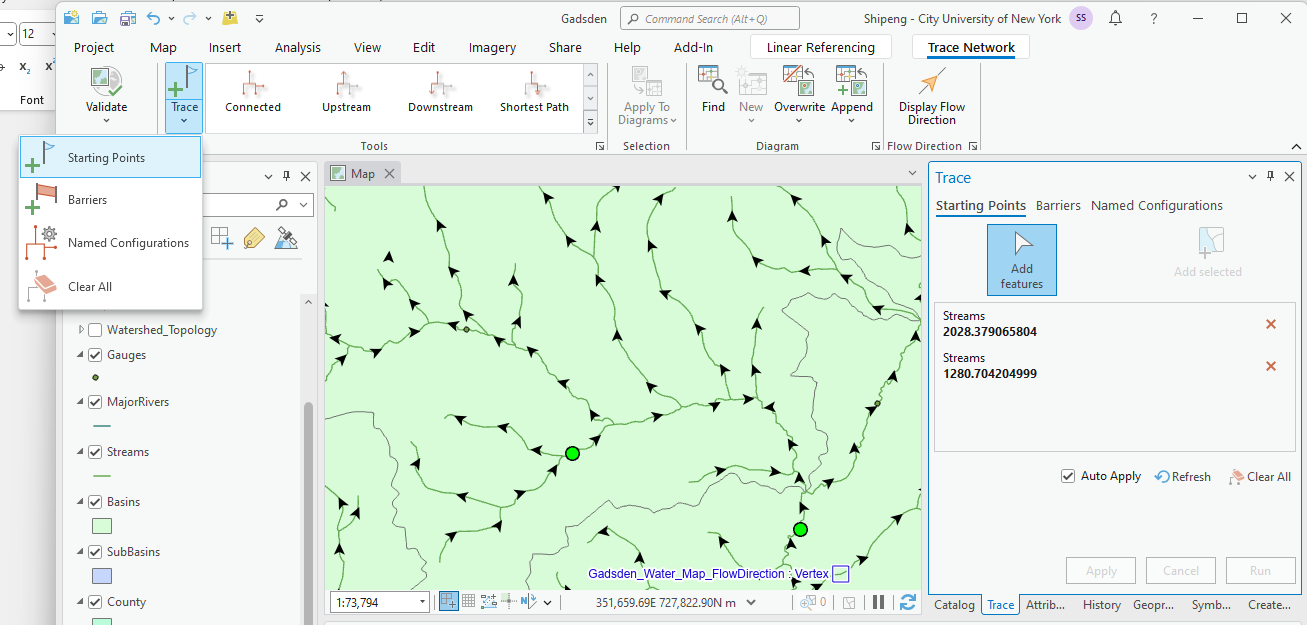
- Then, we can run those Trace Network tools like Connected, Upstream, Downstream, and Shortest Path. These “starting points”, “barriers” will be brought to those tools automatically.
What are the possible applications of such trace analyses? Include at least one specific example in your answers.
- Note the Trace tool does not produce any new data. It just selects results in the “edges”, in this case, the streams. If you want to save the results in a separate feature class or layer, you need to export the selected features.
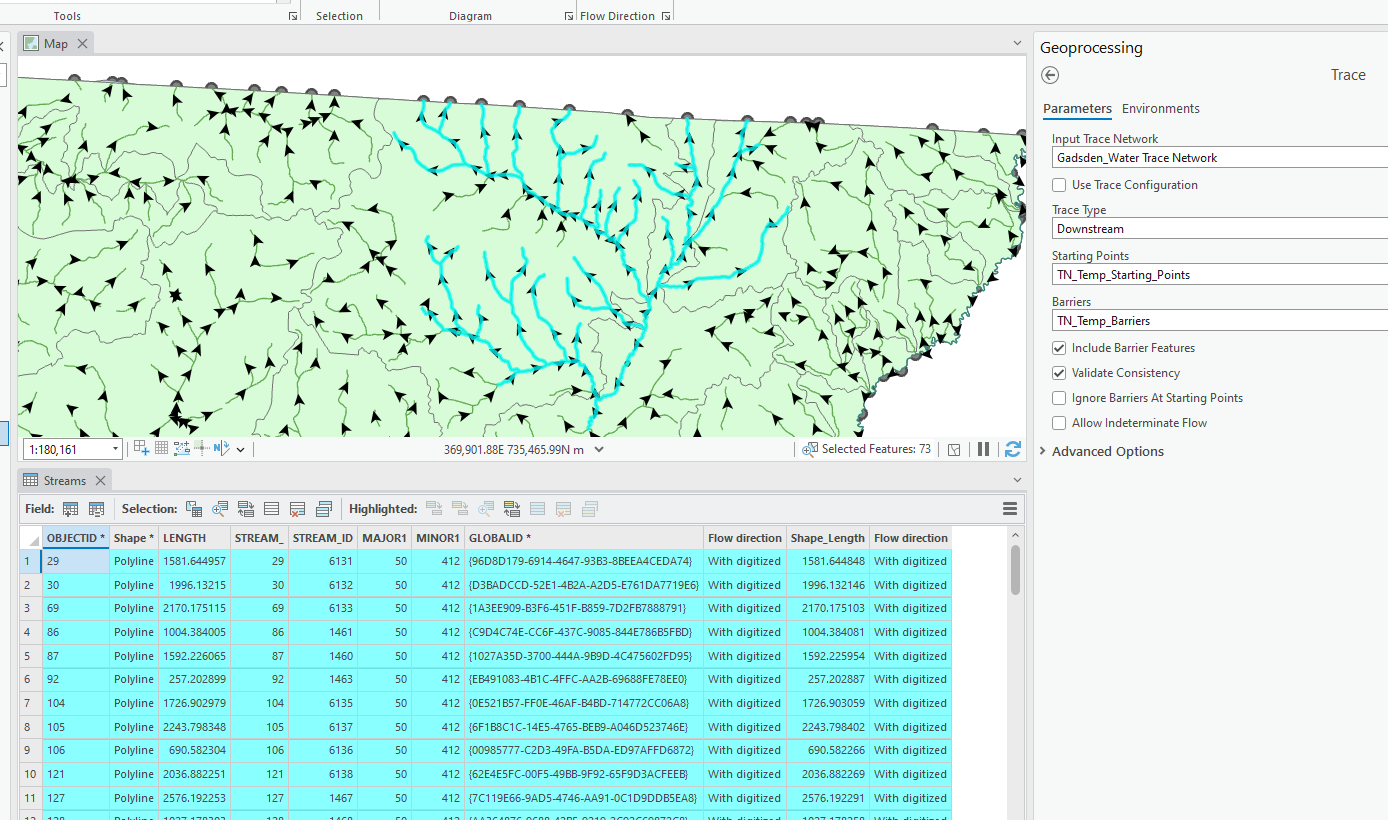
- Now, export at least one downstream or upstream result into a new and separate Feature Class in the FGDB (file geodatabase).
Use as many screenshots as necessary to show your results. Add figure captions to concisely explain the screenshots and your results.
TASK 2 New York State Hydro Network (Optional for GTECH 361, 3 Bonus Points)
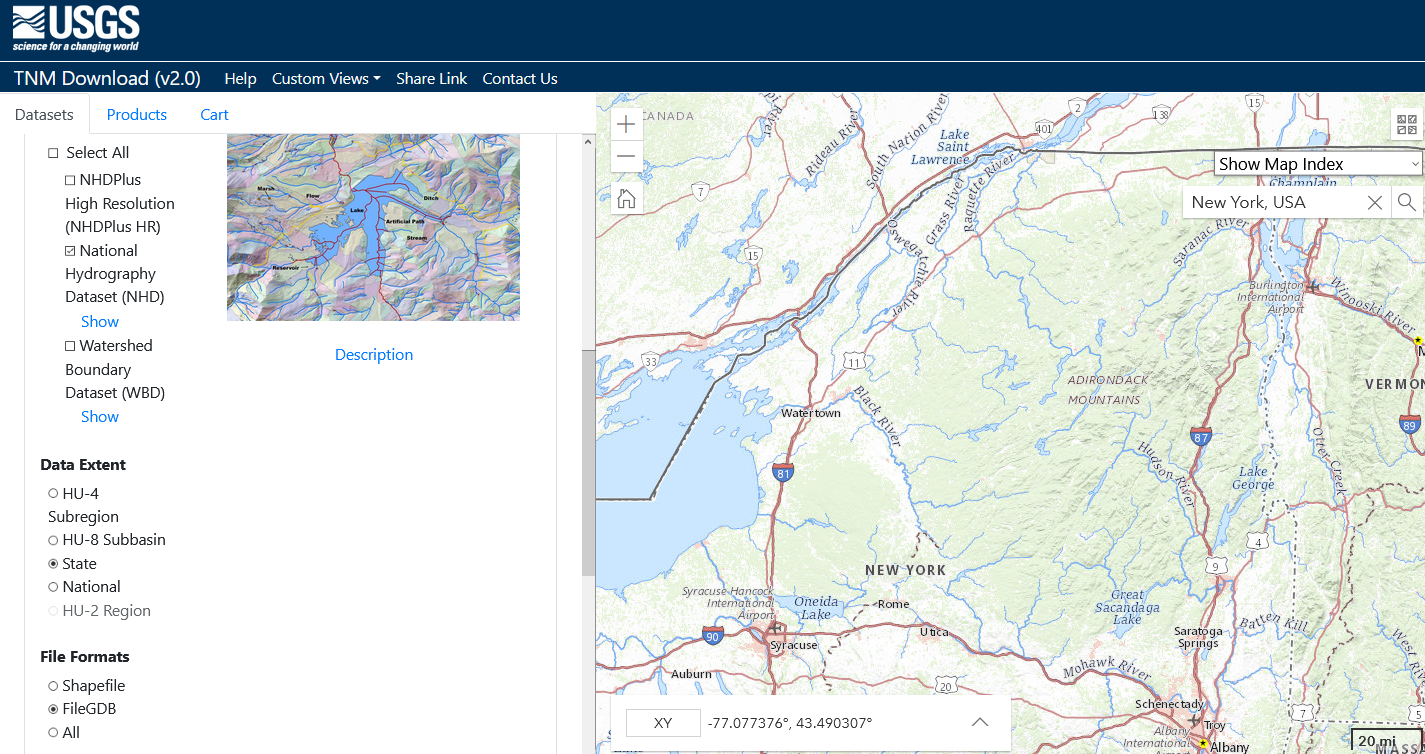
Download the New York State Hydrography Data using TNM download at https://apps.nationalmap.gov/downloader/#/
As in Task 1, create a workable trace network from the data and conduct simple trace analyses.
Note that as the data is quite large, you can clip or select the flow lines using a basin or sub-basin around NYC or other area that you are interested in.
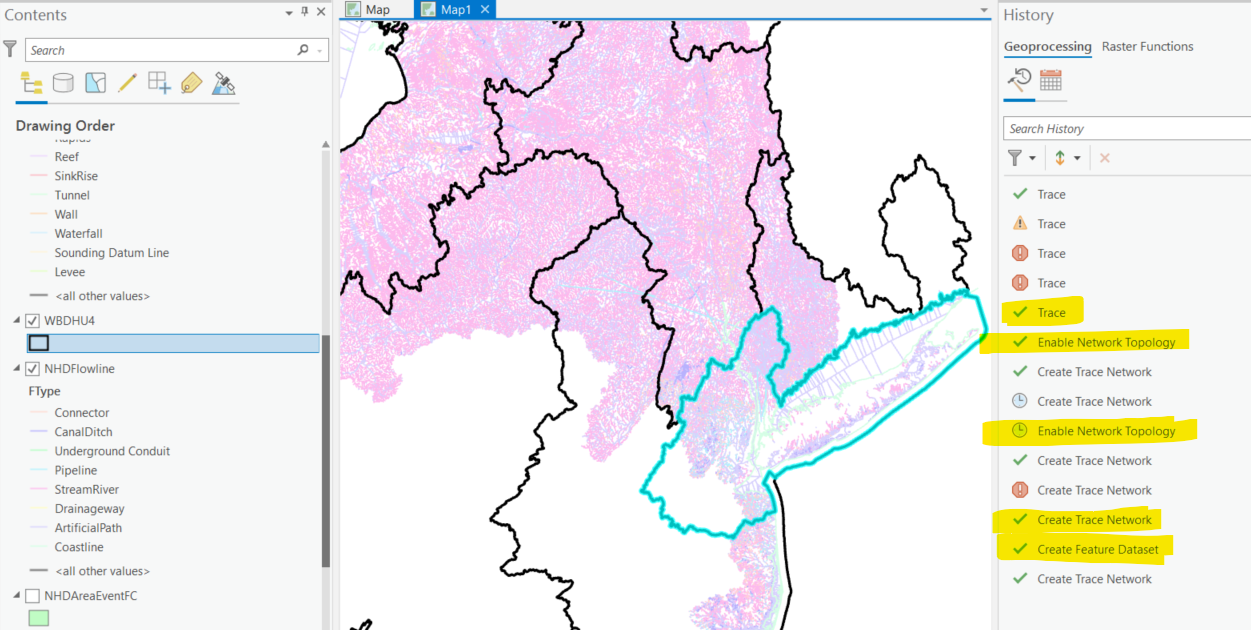
Create a trace network from the NHDFlowLine.
Enable Network Topology on the trace network.
Show flow direction
Conduct an upstream, downstream, and shortest path analysis using the trace network
Use as many screenshots as necessary to show your results. Add figure captions to concisely explain the screenshots and your results.
TASK 3 Transportation Network Analysis
For the transportation network analysis, we will use the standard ArcGIS tutorial available at https://pro.arcgis.com/en/pro-app/latest/help/analysis/networks/network-analyst-tutorials.htm
Choose and complete at least four exercises from the list:
Calculate the travel time between origins and destinations with OD Cost Matrix
Choose the best location with Location-Allocation
Find best routes to service paired orders
Find the shortest path and generate directions with Route
Identify the closest facility
Service a set of orders with a fleet of vehicles
Visualize the reachable area with Service Area
Create a model for route analysis
Create and use a network dataset with public transit data
Create a network dataset
Post at least three screenshots for EACH exercise to show important steps and results. Note that some exercises may depend on results from previous steps.
You can choose to complete up to 3 extra exercises, each of them will add two bonus points. In your submission, clearly label which are exercises for the bonus points.
III. Instructions and Tips
The assignment must be typed and prepared in word-processing software, as hand-written work will not be accepted. The assignment answer file must be submitted through CUNY/Hunter Blackboard. Do NOT zip your document, do NOT send email to submit answers, and do NOT submit your data unless being asked to do so. If you have trouble using Blackboard, please contact the Hunter Help Desk.
The following file naming rule is used for this assignment when you submit the answers.
GTECH_732_361_L04_CUNY_ID.doc|docx|txt
L04 means Lab 04. Do not omit the zero in the; otherwise, there would be file ordering problems on my end. Change the CUNY_ID (the [FirstName].[LastName][two digits]) to your owns.
Thank you!