Setting the analysis
environment
Most Spatial Analyst
operations result in the creation of a new output raster, most often a grid.
The settings you select in the Analysis Options dialog control the geometry of
the output grid (cell size, extent, processing mask, and projection). You may
also set the working directory, where output grids will be created by default.
|
|
|
|
|
|
|
Input Raster |
Analysis Extent |
Analysis Cell Size |
Analysis Mask |
Output Raster |
Although all of these
settings have defaults, it's a good idea to set them before performing an
analysis. While the analysis environment settings are used automatically when a
new raster is created, some functions allow you to override certain settings
like cell size.
The cell size
You can specify the size of the output cells, which
may be different than any of the input rasters.
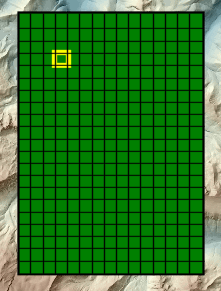
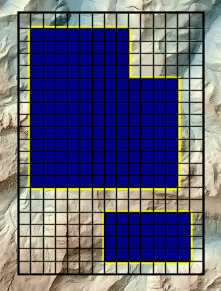
The extent
You can set the width and height of the output raster,
which may also be different than any of the input rasters.
A snapping layer associated with the extent can adjust the boundary of the
specified extent to match another raster or vector layer.
The mask
You can specify a processing mask (either a raster or
vector layer) to identify cells that will be set to NoData
in the output.
The projection
You can set the projection of the output raster to
match a previously added layer, or the projection of the ArcMap
data frame, which you may also set.
The working directory
You may specify the path to a directory where new
output data will be created. If you don't include a path in their names, ArcGIS Spatial Analyst assumes that any input datasets
referenced by their source name, as opposed to their layer names, exist in the
working directory. This mostly affects specifying input data in Map Algebra
expressions entered in the Raster Calculator.